Step 1. Launch New Replication Job Wizard
To launch the replication wizard, do one of the following:
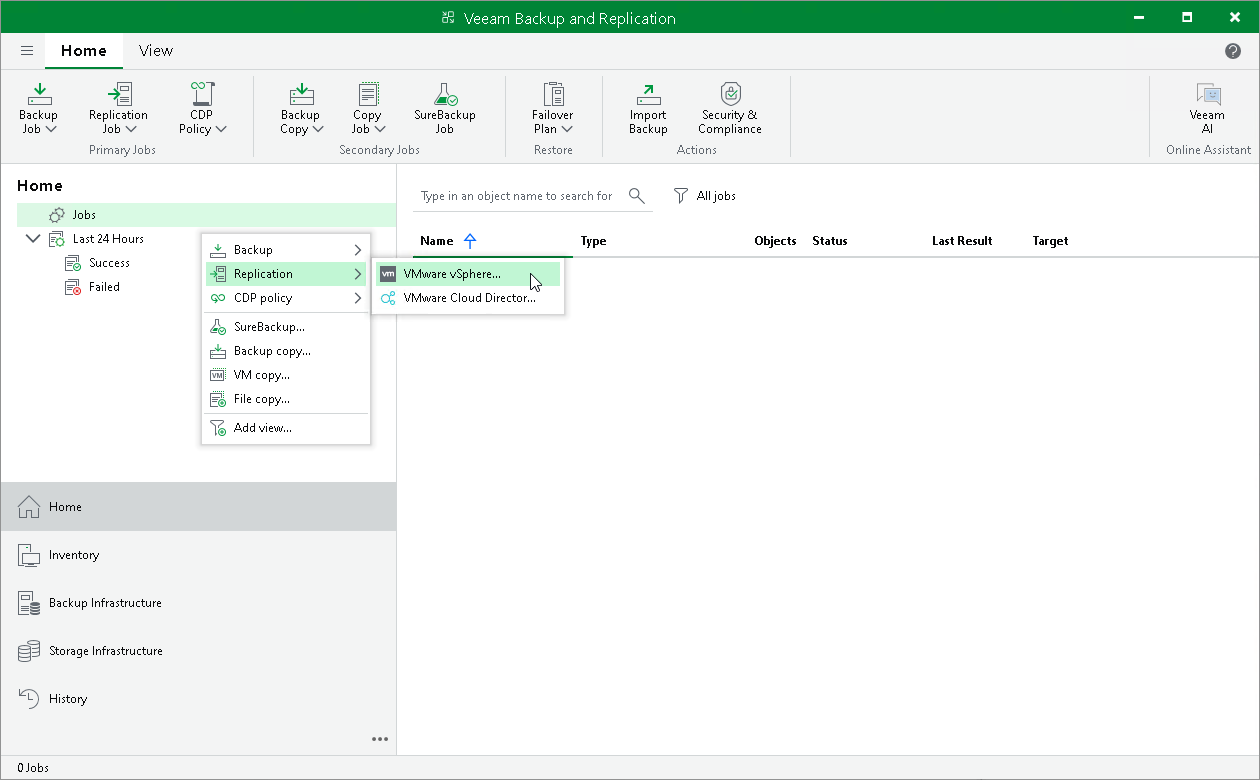
- On the Home view. On the ribbon, click Replication Job > Virtual machine > <Platform>.
- Open the Home view. In the inventory pane right-click the Jobs node and select Replication > Virtual machine > <Platform>.
- Open the Inventory view. In the working area, select VMs that you want to replicate and right-click one of them. Select Add to replication job > New job if you want to create a new replication job, or Add to replication job > <Job Name> if you want to add VMs to an existing replication job.
Step 2. Specify Job Name and Description
At the Name step of the wizard, specify a job name and description, and configure advanced settings for the replication job:
- In the Name field, enter a name for the replication job.
- In the Description field, provide a description for future reference.
- If you want to reduce the amount of traffic sent during the first run of the replication job, select the Replica seeding (for low bandwidth DR sites) check box.
When selected, this check box enables the Seeding step where you will have to configure replica seeding and mapping.
- If your DR site networks do not match your production site networks, select the Network remapping (for DR sites with different virtual networks) check box.
When selected, this check box enables the Network step where you will have to configure a network mapping table.
- If the IP addressing scheme in your production site differs from the scheme in the DR site, select the Replica re-IP (for DR sites with different IP addressing scheme) check box.
When selected, this check box enables the Re-IP step where you will have to configure replica re-IP rules.
- If you want the resource scheduler of Veeam Backup & Replication to prioritize this job higher than other similar jobs and to allocate resources to it in the first place, select the High priority check box. For more information on job priorities, see Job Priorities.
Step 3. Select VMs to Replicate
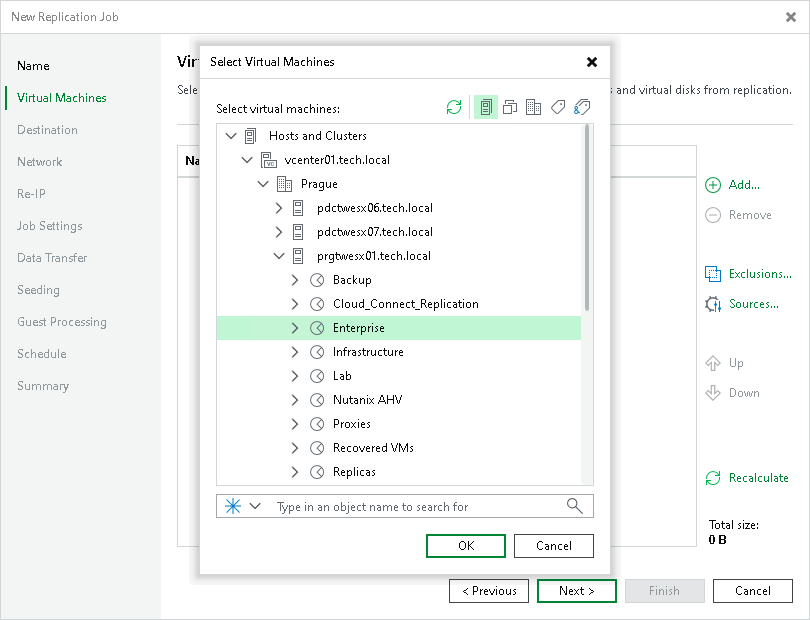
At the Virtual Machines step of the wizard, select VMs and VM containers that you want to replicate:
- Click Add.
- In the Add Object window, select the necessary VMs or VM containers and click Add.
If you select VM containers and add new VMs to this container in future, Veeam Backup & Replication will update replication job settings automatically to include these VMs.
Step 4. Specify Data Source
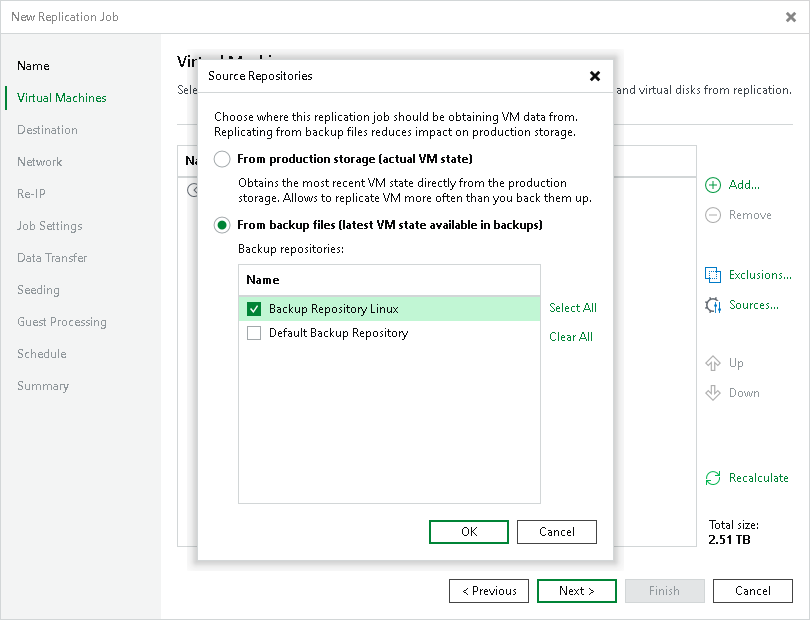
You can enable replication from production storage. For this, select a data source from which Veeam Backup & Replication will read VM data:
- At the Virtual Machines step of the wizard, click Sources.
- In the Source Repositories window, select one of the following options:
- From production storage. In this case, Veeam Backup & Replication will retrieve VM data from datastores connected to the source host.
- From backup files. In this case, Veeam Backup & Replication will read VM data from the backup chain already existing in the selected backup repository. This option can be used in the replica from backup scenario.
Step 5. Specify Replica Destination
At the Destination step of the wizard, select a target host or cluster, resource pool, folder and datastore for replicas, and types of replica disks:
- Next to the Host or cluster field, click Choose and select the Organization VDC: vDC-<customer name>-01
- Next to the vApp field, click Choose and select vApp: vApp-<customer name>-01 from the dropdown.
- You can leave the Storage policy as Replication (Default)
Step 6. Create Network Mapping Table
The Network step of the wizard is available if you have selected the Network remapping option at the Name step of the wizard.
At the Network step of the wizard, configure a network mapping table. This table maps networks in the production site to networks in the disaster recovery (DR) site. When the replication session starts, Veeam Backup & Replication will check the network mapping table. Then Veeam Backup & Replication will update replica configuration to replace the production networks with the specified networks in the DR site. As a result, you will not have to re-configure network settings manually.
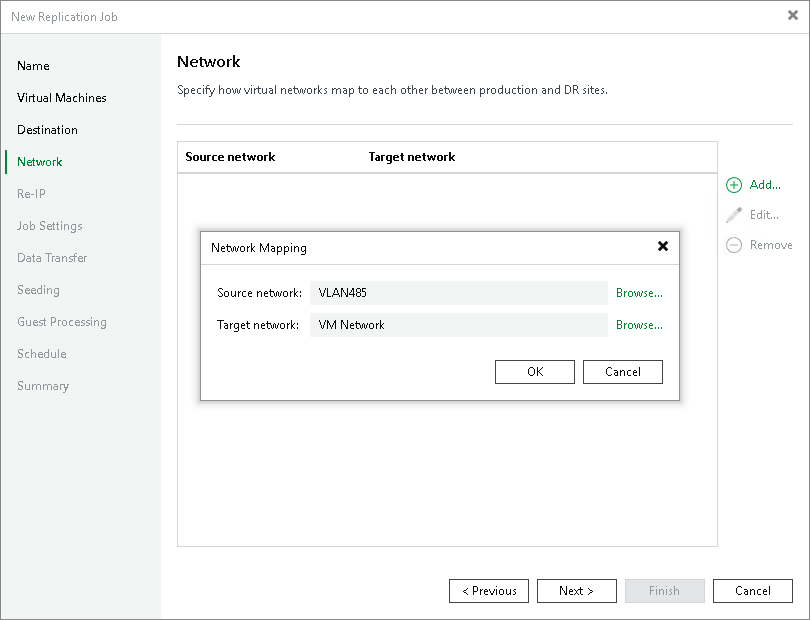
To add a row to the network mapping table:
- Click Add.
- In the Network Mapping window, click Browse next to the Source network field.
- In the Select Network window, select the production network to which the source workloads are connected and click OK.
- In the Network Mapping window, click Browse next to the Target network field.
- In the Select Network window, select a network in the DR site to which replicas will be connected and click OK.
- In the Network Mapping window, click OK.
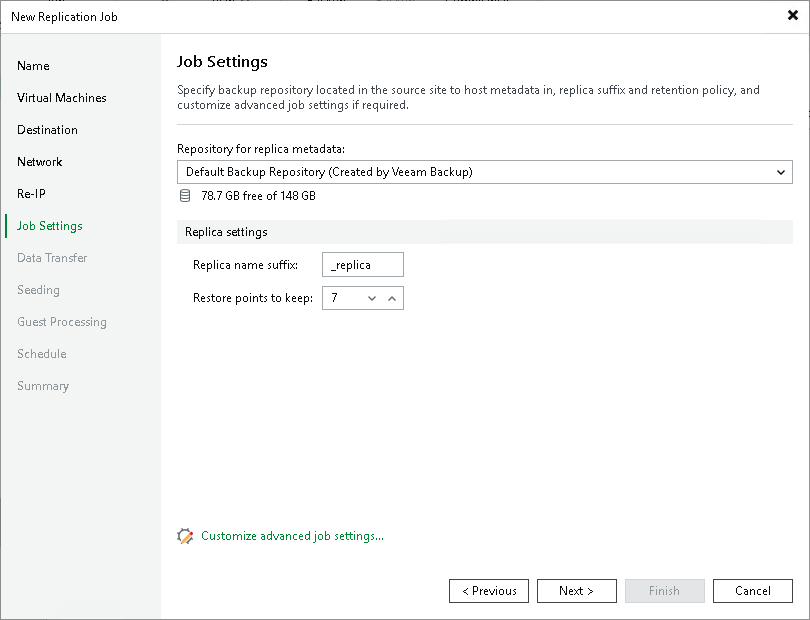
Step 7. Specify Replication Job Settings
At the Job Settings step of the wizard, specify a backup repository for storing replica metadata, replica name and number of restore points to keep:
1. From the Repository for replica metadata list, select a backup repository that will store metadata for VM replicas. For more information on the recommended repository location, see Backup Infrastructure for Replication.
2. In the Replica name suffix field, enter a suffix that will be added to the source VM names. To register a VM replica on the target host, Veeam Backup & Replication appends the specified suffix to the name of the source VMs.
3. In the Restore points to keep field, specify the number of restore points that the replication job must maintain. Due to VMware restrictions on the number of VM snapshots, the maximum number of restore points for VM replicas is limited to 28. When the specified number is exceeded, Veeam Backup & Replication removes the earliest restore points.
Consider the following:
- You cannot store VM replica metadata on deduplicating storage appliances. During replication jobs, Veeam Backup & Replication frequently reads and writes small portions of metadata from/to the backup repository. Frequent access to metadata causes low performance of deduplicating storage appliances, which may result in low performance of replication jobs.
- You cannot store replica metadata in a scale-out backup repository or object storage repository.
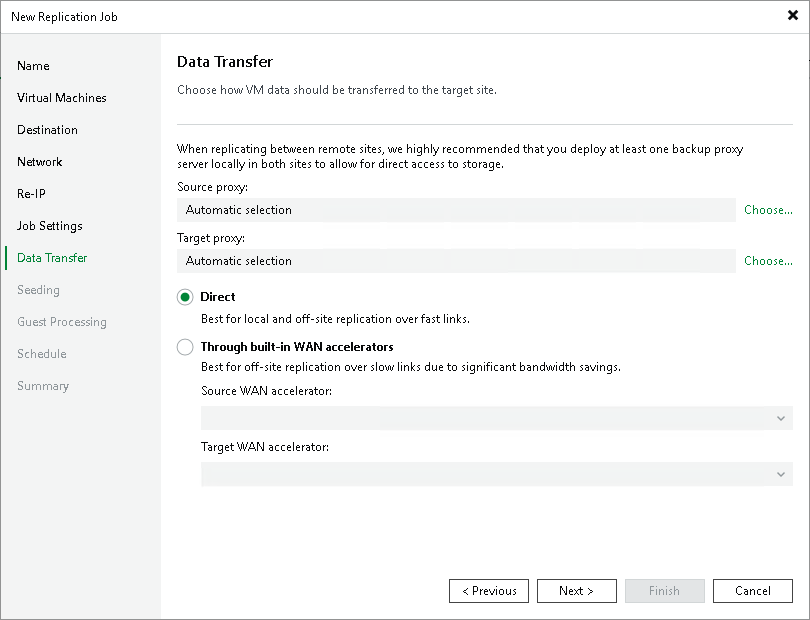
Step 8. Specify Data Transfer Settings
At the Data Transfer step of the wizard, select backup infrastructure components that must be used for the replication process and choose a path for VM data transfer:
- Specify which backup proxies you want to use:
- If you want Veeam Backup & Replication to select proxies automatically, leave Automatic selection in the Source proxy and Target proxy fields.
Veeam Backup & Replication will assign backup proxies for VM processing one by one. Before processing a new VM from the list, Veeam Backup & Replication will check available backup proxies. If more than one backup proxy is available, Veeam Backup & Replication analyzes transport modes that the backup proxies can use and the current workload on the backup proxies to select the most appropriate backup proxy for VM processing.
- If you want to select backup proxies manually, do the following:
- Click Choose next to the Source proxy field if you want to select backup proxies in the production site, or next to the Target proxy field if you want to select backup proxies in the disaster recovery site.
- In the Backup Proxy window, click Use the selected backup proxy servers only. Select proxies that you want to use and click OK.
Consider the following:
- The Source proxy field is not available for the replication from backup scenario.
- If you plan to replicate VM data within one site, the same backup proxy can act as the source and target backup proxy. For off-site replication, you must deploy at least one backup proxy in each site to establish a stable connection for VM data transfer across sites.
- We recommend you to select at least two backup proxies to ensure that the job will be performed if one of backup proxies fails or loses its connectivity to the source datastore.
- Select a path for VM data transfer:
- To transport VM data directly using backup proxies to the target datastore, select Direct.
Step 9. Define Seeding and Mapping Settings
To configure replica seeding:
1. Make sure that you have backups of replicated VMs in a backup repository in the DR site.
Consider the following:
- Backups must be created by Veeam Backup & Replication.
- Backups must not reside in a scale-out backup repository.
2. In the Initial seeding section, select the Get seed from the following backup repository check box.
3. From the list of available backup repositories, select the repository where your replica seeds are stored.
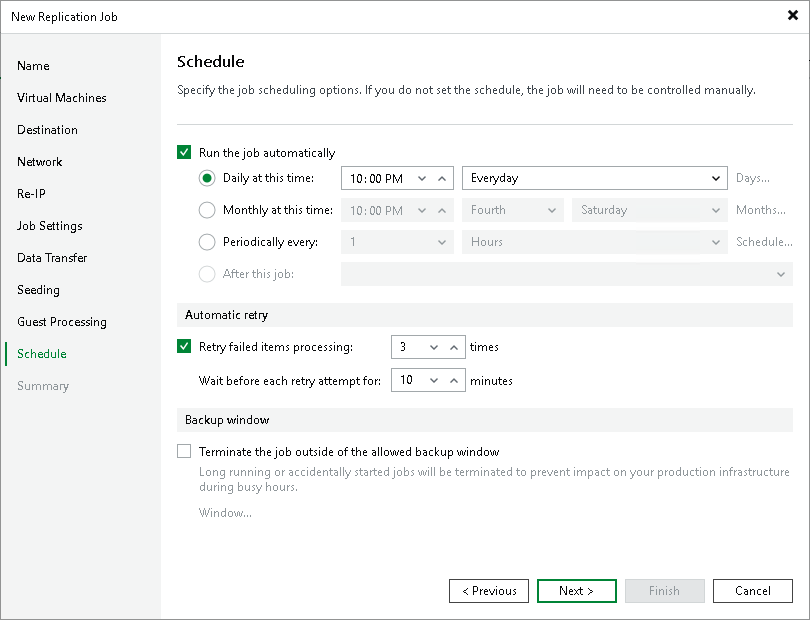
Step 10. Define Job Schedule
At the Schedule step of the wizard, select to run the job manually or schedule the job to run on a regular basis:
1. To run the job automatically, select the Run the job automatically check box. If you do not select this check box, you will have to start the job manually.
2. Select the required schedule option:
- Daily at this time. The job will run at a specific time daily, on weekdays or with specific periodicity. In the fields on the right of the radio button, specify the time and required days.
- Monthly at this time. The job will run once a month on specific days. In the fields on the right of the radio button, specify the necessary days.
- Periodically every. The job will run repeatedly throughout a day with a set time interval.
- After this job. The job will be chained. From the drop-down list, select a job after which the current job will run.
3. In the Automatic retry section, select the Retry failed items processing if Veeam Backup & Replication must attempt to run the job again for workloads whose processing failed for some reason. Enter the number of attempts to run the job and define time spans between them.
If you select continuous schedule for the job, Veeam Backup & Replication will retry the job for the defined number of times without any time intervals between the job sessions.
4. In the Backup window section, specify a time interval within which the job must be completed. The backup window prevents the job from overlapping with production hours and ensures the job does not provide unwanted overhead on your production environment.
To set up a backup window for the job:
- Select the Terminate the job outside of the allowed backup window check box and click Window.
- In the Time Periods window, define the allowed hours and prohibited hours for the job. If the job exceeds the allowed window, the job will be automatically terminated.
Step 11. Finish Working with Wizard
At the Summary step of the wizard, review details of the replication job.
If you want to start the job right after you close the wizard, select the Run the job when I click Finish check box, otherwise leave the check box unselected.
Then click Finish to close the wizard.

Should you have any other questions, please contact our Service Desk by emailing support@vgrid.nz or phoning 0800 425 383 during business hours.
Comments
0 comments
Article is closed for comments.